
Big Data Analytics: How Business Leaders Can Turn Data into Actionable Strategies
Microsoft Fabric Notebooks offer a powerful environment for data analysis and transformation. But what if you need to leverage Git's version control capabilities for your DBT packages? This step-by-step guide will equip you with the knowledge to set up Git in your Fabric Notebooks, enabling seamless collaboration and version control for your data pipelines. By the end of this blog, you'll be ready to harness the power of Git within your Fabric Notebooks and unlock a new level of efficiency in your data transformation workflows.
In this blog, you will find:
💻 How to Setup Git in Microsoft Fabric Notebooks
📈 Step 1: Ensure Your Workspace is Using Runtime 1.2
📨 Step 3: Load the .yml File Into Your Workspace
🔌 Step 4: Confirm Git is Working in Your Notebook
How to Setup Git in Microsoft Fabric Notebooks
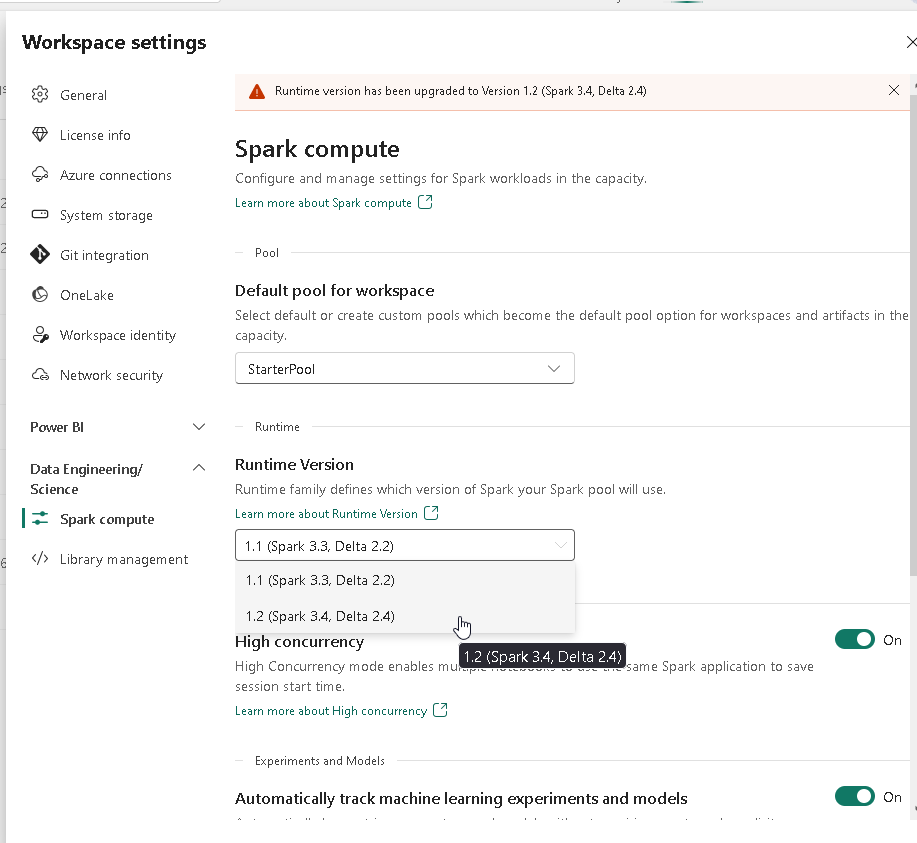
Step 1: Ensure Your Workspace is Using Runtime 1.2
1. Go to your desired workspace.
2. Click on “Workspace settings.”
3. Click on “Data Engineering/Science.
4. Click on “Spark compute.”
5. In the “Runtime Version” dropdown, select “1.2 (Spark 3.4, Delta 2.4).”
6. Click “Save.”
Step 2: Create a .yml File
Open up notepad, paste in the following and save it as a .yml file on your local machine.
name: Fabric1.2_GitWorkaround
channels:
  - conda-forge
  - defaults
dependencies:
  - git
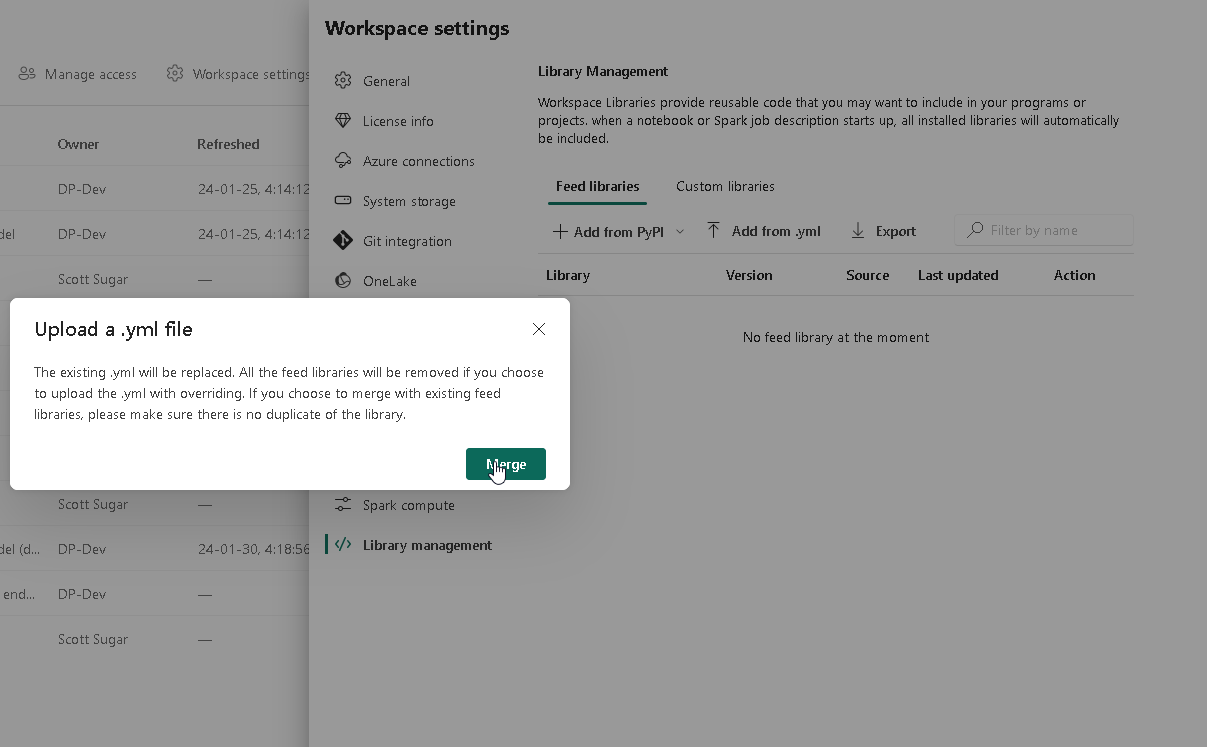
Step 3: Load The .yml File Into Your Workspace
1. Go to your desired workspace (same one we confirmed is using Runtime 1.2).
2. Click on “Workspace settings.”
3. Click on “Data Engineering/Science.
4. Click on “Library management.”
5. Click on “Add from .yml.”
6. Select the .yml file created above.
7. Click “Merge” in the pop up.
8. Click “Apply” and “Apply” again.
This change will then process in the background - it can take 20-30 minutes.
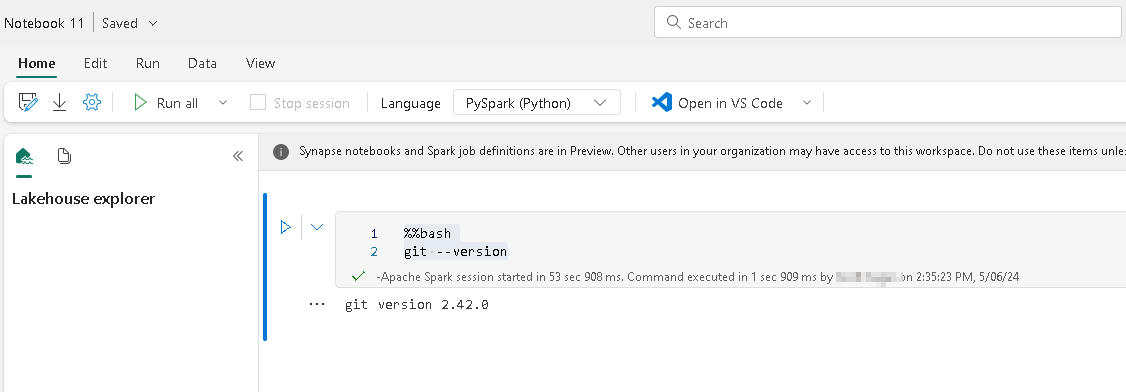
Step 4: Confirm Git Is Working In Your Notebook
Place the following code into a new notebook in the desired workspace:
%%bash
git --version
Output should look like this:
You may be interested in these blogs:
💰 Efficient Cost Management with Copilot for PowerBI: A Complete Guide
📈 Power BI Usage Metrics Across All Workspaces: Step-by-Step
📊 How AI Data Analysis Enhances Analytics: Key Benefits & Top Tools
Conclusion
By following this guide, you've successfully unlocked the power of Git within your Microsoft Fabric Notebooks. This empowers you to collaborate seamlessly with your team and maintain a clear history of changes within your DBT packages, ultimately improving the efficiency and maintainability of your data transformation workflows.
Unleash the Full Potential of Your Data Transformation
Ready to take your data transformation to the next level? ProServeIT can help! As a Microsoft Solutions Partner in Data & AI, our team of certified professionals is here to empower your organization to leverage the full potential of your data.
Contact ProServeIT today and schedule a consultation with our data specialists.


From the 1980's, when his father used to hand down old computer equipment, to now, Scott Sugar has always had a fascination with technology. The ability to communicate with people, regardless of distance or location, is, in Scott's opinion, one of the best things about tech. With over 20 years of experience in the IT industry, and 17 years at ProServeIT, Scott's areas of expertise include data & analytics, and IT operations, monitoring, and alerting. Scott heads up ProServeIT's Ho Chi Minh City, Vietnam office. He has spent the majority of his adult life in Asia, and speaks 3 languages.


Comments